
Server 2012 - No User Interface Available

On one fine day when I was busy with one of my project, one of my collegue tapped my shoulder, a bit panicking.
He : Heiry, take a look at this...
Me : Dude, what on earth have you done? (serious face)
He : I dont know man, I uninstalled .Net Fx 4.5, reboot the machine and this happened
Me : Dude, What on earth was the reason you uninstalled .Net Fx 4.5?
He : Well, I thought ....
Me : (Evil Smile)
So here is the thing. When we uninstalling .Net Fx 4.5, those related features would be uninstalled as well, including a feature called User Interfaces and Infrastructure. Please refer to here.

There are 2 ways to get it done - locally or remotely. For the purpose of this post, I will do it remotely from another Windows Server 2012 member server.


Issues :

Unable to view GUI in Server 2012.


Troubleshooting :

it is straight forward, GUI is disabled, RDP to the server, the only screen one can see is :


Resolution :

  1.  RDP to another Server 2012 member server.

  2.  Launch Server Manager, and click at Add other servers to manage


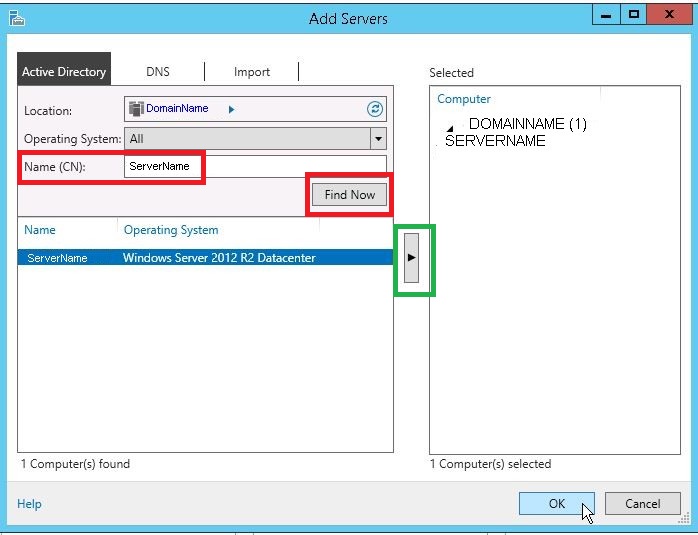
  3. Put the target server name at Name (CN) column, and press Find Now. Once the target server appeared in the table, click at the server name and press the arrow button marked with green box as below. The target server will appeared in the right column.

  4. Then, click kat Manage | Add Roles and Feature


  5. Ensure to choose Select a server from the server pool, and choose the target server. Press Next.

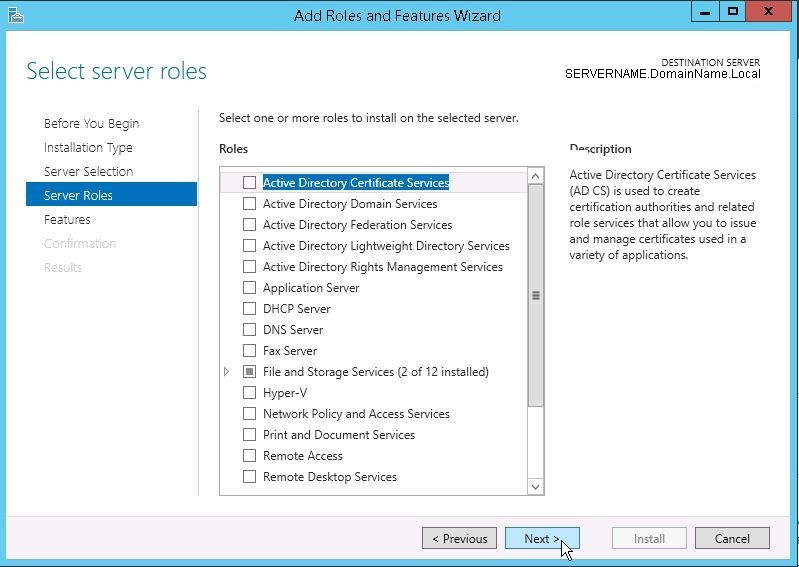
  6. At Server Roles option, skip it by pressing Next

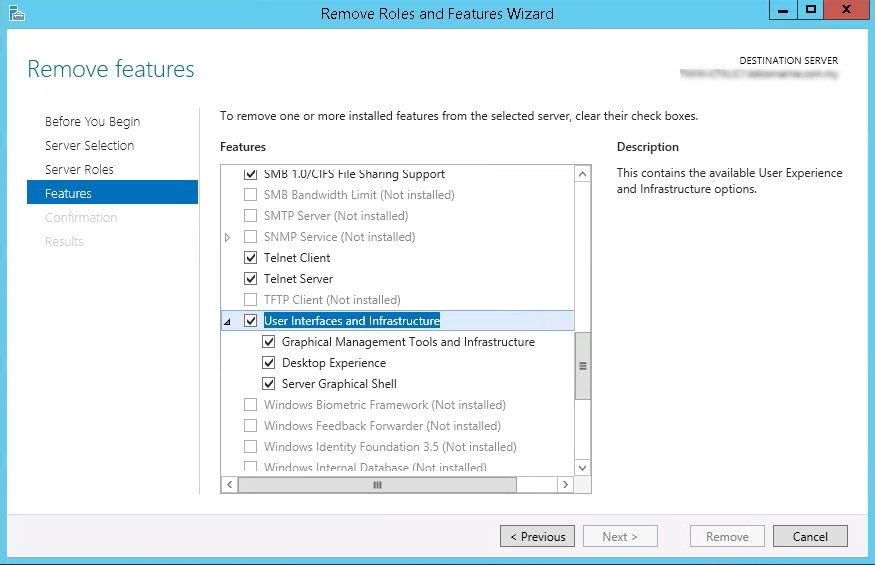
  7. At Feature option, enable a feature called User Interface and Infrastructure. Press Next.


  8. Ensure all info are correct, and press Install to proceed.

  9. Restart the server if needed. then RDP to the server to ensure the GUI can be used again.

Comments

Popular posts from this blog

How To Change NetBIOS Name of A Computer

So yes... After 4 months without new contents, so I started with this. It looks easier to do (well, it is), but before you do that, you may want to read this  to understand the difference between hostname and netBIOS, then starts to explore on when to use them, their limitations etc etc. I won't discuss here (or maybe not today). So let's back to the topic.   Description : Changing NetBIOS Name of A Computer. ComputerName : NetBIOS : How To Do :  Go to Start > Run , and type REGEDIT  Browse to Computer > HKEY_LOCAL_MACHINE > SYSTEM > CurrentControlSet > Control > ComputerName > ComputerName At the right side, double click at ComputerName string, and put correct Value data . Press OK .  Then you will get this Reboot your computer / VM. Once it is up, double check your netBIOS name. New name shall be reflected

Microsoft Assessment and Planning (MAP) Toolkit - Extract Report (3/4)

As mentioned in  the first post , this KB series is about Microsoft Assessment and Planning (MAP) Toolkit. There are 4 main steps : Install MAP Toolkit and its basic configuration Collect inventory Data  Extract Report Extract Advanced Report Once inventory data collected, we can generate reports. From the inventory data collected earlier, we can use options in the toolkit to generate the report. For this example, we re going to discover Windows 10 Readiness This KB is about  how to generate report from collected inventory data. At Overview page, select the targeted scenario category. In this example, it is Desktop . At this page, select specific scenario that we after. In this example, it is Windows 10 Readiness.     It is possible to customize assessment properties. The properties will set the threshold of the assessment, such as, threshold for minimum CPU speed, acceptable free disk, as well as minimum assigned RAM. To do so, s...

Microsoft Assessment and Planning (MAP) Toolkit - Install MAP Toolkit and its basic configuration (1/4)

As mentioned in previous post , this KB series is about Microsoft Assessment and Planning (MAP) Toolkit. There are 4 main steps : Install MAP Toolkit and its basic configuration Collect inventory Data  Extract Report Extract Advanced Report This KB is about how to install MAP Toolkit and its basic configuration Download the toolkit here : https://www.microsoft.com/en-nz/download/details.aspx?id=7826 Launch the installer with Administrator privilege Select Next on the welcome screen Accept the agreement and select Next Configure installation path, and select Next Ready to install. Select Install Installing… Select Finish Launch the app MAP launched. DB needs to be set up prior to use the toolkit Connection to inventory database needs to be created. Give it a name , and select OK . Note that by default, the data source name is  LocalDB (MAPToolkit) Overview page of MAP. Step completed.